
 US Dollar
MSD 6014 Wiring & Setup Guide: Carbureted LS Ignition | Scram Speed
Posted by Steve on 20th Aug 2026
Mastering the MSD 6014: How to Wire and Install Your Carbureted LS Engine Control
At Scram Speed, we build and tune a wide variety of LS combinations, from extreme twin-turbo Holley Dominator setups to simple, reliable street cars. But when it comes to raw bang-for-the-buck performance and clean engine bay execution, a carbureted LS engine with an MSD 6014 LS Ignition Control is tough to beat.
Installing the MSD 6014 is vastly simpler and more affordable than wiring a full EFI swap, especially if your chassis was originally carbureted. However, because digital ignition controllers rely on precise voltage and ground signals, improper wiring is the number one reason builders run into issues.
Here is the ultimate guide to installing, wiring, and troubleshooting your MSD 6014 ignition box.
1. What Comes in the Box (And What You Still Need)
The MSD 6014 handles both Gen 3 (24x reluctor wheel) and Gen 4 (58x reluctor wheel) LS engines with a single box. Unlike older MSD models, you don't need to purchase different units or chop up a factory wiring harness.it includes dedicated crank and cam sensor harness leads for both setups.
The Missing Piece: Factory Coil Harness Sub-Harnesses The main MSD harness plugs into the sub-harnesses mounted on the factory metal coil brackets. If your core engine did not come with these short factory coil harnesses, the MSD box cannot connect to your coils.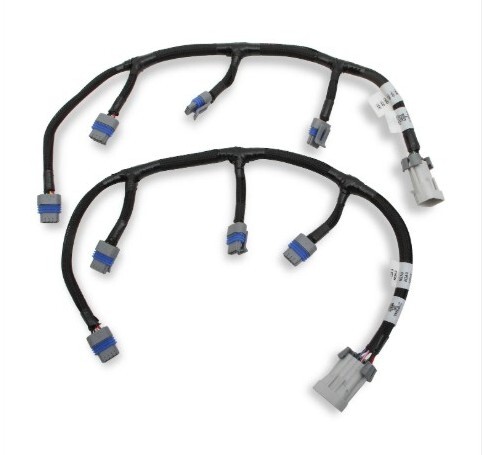
If you didn't get these harnesses with your engine, we have them here:
Short LS ignition coil harnesses
2. Choosing the Right Mounting Location
While MSD’s marketing material often shows the box mounted inside the engine bay, mounting it inside the vehicle cabin is highly recommended.
-
The MSD 6014 board is potted, but the multi-position timing selector dial and USB programming port are prime entry points for water and engine bay moisture.
-
Cabin mounting keeps the unit safe from header heat, vibration, and water intrusion.
Tip: Lay the harness over the chassis in your intended mounting spot before drilling or securing the box to ensure you won't need to extend any sensor leads.
3. Grounding: Over 90% of Tech Support Calls End Here
Digital ignition systems demand absolute ground integrity. Over 90% of the tech calls answered at Scram Speed for non-starting MSD boxes boil down to faulty or improper grounds.
-
Coil Harness Grounds: Each coil harness side has its own dedicated ground ring. Do not attach these grounds to the valve covers. Valve cover gaskets and rubber-isolated bolt grommets prevent a true electrical ground. Attach them directly to the engine block.
-
Main Box Ground: Extension of this wire is recommended to attach it directly to the negative battery terminal. If that is not possible, ground it to a heavy chassis or frame point that shares a direct, heavy-gauge cable to the battery negative post.
-
Aluminum Engine Blocks: Aluminum blocks require additional ground strap density compared to iron blocks. Never assume an engine block is grounded.use a digital multimeter to test continuity between your ground points and the battery negative post.
4. Power Wiring: Delivering True 12V
Unlike old-school analog ignition boxes that will operate on low voltage, digital ignition controllers require a solid, stable 12 volts to function. Under-voltage will prevent the box from firing entirely.
-
Avoid Test Lights: Do not use a test light to check power. A test light will illuminate at voltage levels far too low to wake up the digital board. Always test with a voltmeter under both key-on and cranking conditions.
-
Avoid Legacy Wiring Bottlenecks: Tapping into 40-year-old factory ignition switch wiring, fuse taps, or un-fused toggle switches causes inconsistent voltage drops. These should not be used for primary power.
-
The Relay Solution: Use a dedicated automotive relay triggered by your ignition switch, or step up to a solid-state relay module to supply clean, direct battery power to the box.
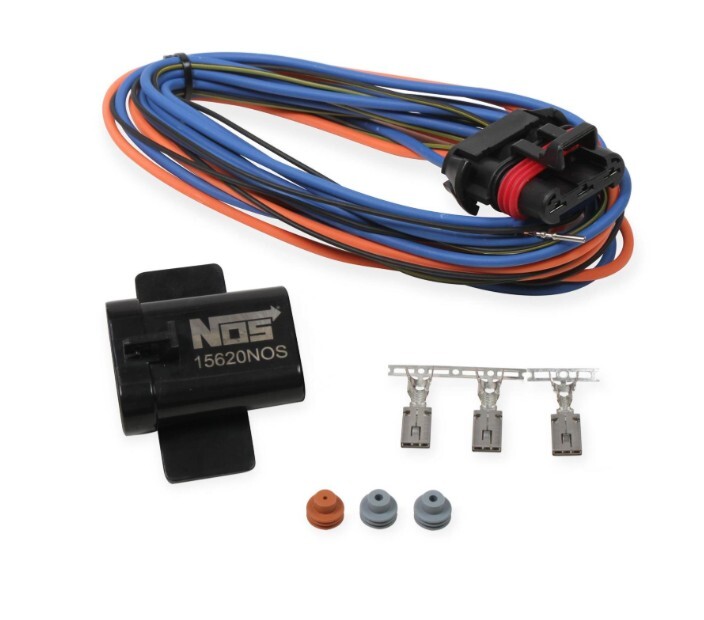
Here's what we use when we do these installations in-house:
Solid State Relay Kit
5. Wiring Optional Race Features
Once your power, ground, crank, cam, and coil connections are secured, you can utilize the optional feature leads:
-
MAP Sensor (Vacuum Hose): Connect the internal MAP sensor to intake manifold vacuum to enable vacuum advance timing curves for cruising efficiency.
-
Blue Wire (Two-Step Rev Limiter): Connect this lead to your trans-brake or clutch switch to engage the adjustable launch RPM limiter.
-
Gray Wire (Tachometer Output): Connect directly to your tachometer input wire (outputs a clean 8-cylinder tach signal).
-
Pink Wire (Timing Retard): Wire this to a +12V source (such as a nitrous solenoid trigger) to pull a pre-programmed amount of timing while activated.
6. Fast Troubleshooting Advice
If your engine cranks but won't start after installation, perform these simple diagnostic checks before assuming the box is defective:
-
Test Board Power via USB: Plug a laptop running the MSD View software into the box's USB port. The USB connection supplies power to the internal board directly. If the software communicates with the box, the internal processor is healthy.
-
The Direct-to-Battery Bypass: Run temporary jumper wires for both the main power and ground leads directly to the battery posts. Crank the engine. If it pops or starts, your vehicle's chassis power or switch circuit is dropping voltage.
-
Isolate Carburetor vs. Ignition Issues: It is common to suspect ignition failure when an engine hesitates or stalls, but double-check your carburetor float levels, idle transfer slots, and fuel pressure before altering timing curves.
Thanks for checking out our blog!
Next time, we'll talk about using the included software and common tuning techniques.